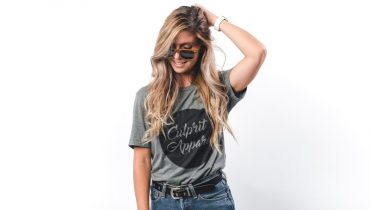
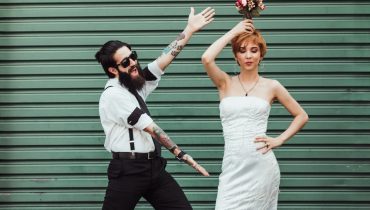
When it comes to styling, medium-length hair takes the price for versatility. There so many things you can do with it whether you want to make it shorter with a tight updo or lengthen it stylishly with a long bob. You can even go messy with rumpled windblown waves and it’ll still look gorgeous.
Here are four really simple hair styles for shoulder-length hair. They all take just a few minutes to style and they are versatile enough that you can wear them on different occasions.
1. The Sleek Long Bob
The long bob, a.k.a the Lob, is a safe and sure style for medium length hair. It’s an extended version of the traditional jawline bob. The long bob goes down to the shoulders and retains the characteristic framed-face look.
There are many long bob styles ranging from wavy to shaggy. My favourite is the sleek long bob. It looks elegant and blends in many different situations be it the office or an evening party.
How to do a Sleek Long Bob
If you have long hair, you need to cut it to a shoulder-length bob first. The best place to do this is at the salon to ensure it comes out well. If you have the time and you trust your hands, you can also do it at home. Here’s a simple tutorial on how do a DIY bob cut.
If you already have shoulder length hair all you need to do is give it a sleek rounded look. Start by applying a styling cream. This smoothens out your hair and adds definition. It’s also great holding in moisture and keeping your hair soft and silky through the day. Apply the cream on the end lengths of the hair to avoid clumping your roots and weighing them down.
Give your hair a quick blow dry to relax it some more and get rid of any remaining frizz. Make sure you use the low or medium heat setting since you are going to be using a flat iron soon after and you don’t want too much heat exposure.
After blow drying, smooth it down with a flat iron. You can finish it off with a finishing spray to give it a high-sheen look.
2. Messy Waves
This is a more ruffled take on the sleek lob. It’s what I’d call a stylish mess. The best thing about it is that you can mess it up in many different ways. You can have symmetrical waves, perfect for formal occasions or you can go for shaggy waves which are versatile enough for any occasion.
The shaggy wave style looks especially cool when combined with a hair colour style like Ombre or Balayage.
How to do Messy Waves
First decide what kind of waves you want. Something sleek and neat or boyish and beachy? The best style depends on your tastes, shape of your face and occasion.
If your hair is rough and frizzy, a quick blow dry should get it ready for styling. If it’s good to go, skip to the second step – applying a thickening or volumizing spray. This will give your curls a full look that balances out the messiness.
The last step is using a curling iron. Make sure you’ve applied a heat protectant spray before using the curler.
Here is where you can create a wide variety of styles just by varying the thickness of the curling wand. A thicker wand produces large gentle waves while a thinner wand produced tighter curls and ringlets. You can even create the curls just on the bottom, leaving the top half straight. A finishing shine spray should perfectly round off the look.
Here is a simple video tutorial you can use.
3. A Basic 3-Minute Updo
Updos styles are go-to favourites for ladies with medium length hair. They are quick and easy to do. The hair is short enough that it forms a nice tight bun but still long enough that it’s easy to handle.
There are gazillions of updo hair styles you can try. There are the fairly complicated ones perfect for brides and simpler ones you can do in a matter of minutes in front of a mirror. The basic 3-minute updo is one of my favourites.
How to do a Basic 3-minute Updo
It’s best to start with textured hair. Use curling tongs or wand to quickly twirl the ends of your hair into messy curls. Go for medium-sized curls.
Take most of your hair – sweep it from the front with both hands – and pin it up at the top of your head using clips. This is to keep it out of the way as you focus on the remaining section at the back.
Apply volumizing spray to the remaining section to make it fuller. You can also just use your fingertips to tease out the hair.
Take an elastic band and tie the section into a ponytail. Take another elastic band and use it to create a bun out of that ponytail. Simply fold the ends of the ponytail back towards your head and secure them using the elastic. If there are hairs that have not been caught in the bun, fold them with your hand back onto your head and attach them using bobby pins.
All that remains is to let down the rest of the hair, tie it into a pony tail above the earlier bun and then do a piggy flip. Fold the pony tail into a smaller bun and hold it into place using a pin.
Watch this video for an easy step-by-step explanation.
4. A Versatile Bun for Every Occasion
Buns are some of the easiest and quickest styles for medium length hair. You can do one in less than a minute.
They are also some of the most versatile. You can create a tight bun for formal settings or mess it up a bit for a casual style.
How to do a Simple Bun
This is the most basic bun. Just take your hair into a pony tail but don’t hold it with a rubber band. Instead twist the pony tail to the tip then wrap it around itself on your head in a spiral motion. Insert the tip under the spiral and secure the whole bun with an elastic band. You can also use a spin pin to make sure it doesn’t get loose.
If you want a smooth neat look, use a flat iron and styling cream before wrapping the hair into a bun. If you want a fluffier ruffled look, add some curls before making the bun.
Here’s a quick video showing four different bun styles.


